时间:2021-07-01 10:21:17 帮助过:9人阅读
那我们就从JDBC连接来看mysql驱动是怎么实现这些接口来连接数据库的。
首先写了一个简单的数据库连接程序,和mysql 建立连接
当前使用的mysql驱动是 mysql-connector-java-8.0.22.jar、jdk8.
Connection connection = DriverManager.getConnection("jdbc:mysql://localhost:3306/mybatisplus?serverTimezone=Asia/Shanghai","root","123456") ;
       Statement statement =  connection.createStatement() ;
       ResultSet resultSet = statement.executeQuery("select * from user") ;
       while (resultSet.next()){
           System.out.println((resultSet.getString("name")));
       }
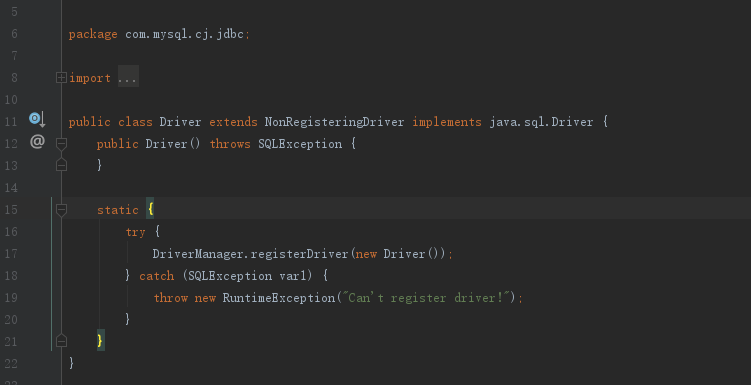
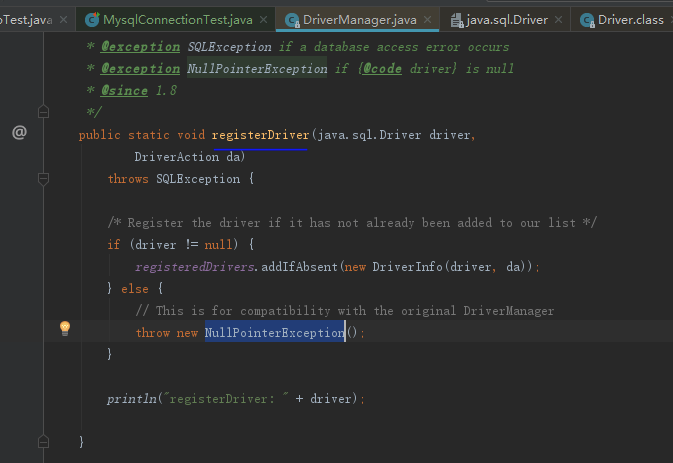
首先我们的mysql驱动类 com.mysql.cj.jdbc.Driver通过实现 java.sql.Driver ,会在应用启动时把驱动注册到DriverManager当中去。这也就是说,当我们以后需要自己开发一个驱动时,也是一样的去实现 java.sql.Driver 。

DriverManager 内部是维护了一个 list来存储这些注册的驱动,以供后续使用的。
// List of registered JDBC drivers
private final static CopyOnWriteArrayList<DriverInfo> registeredDrivers = new CopyOnWriteArrayList<>();

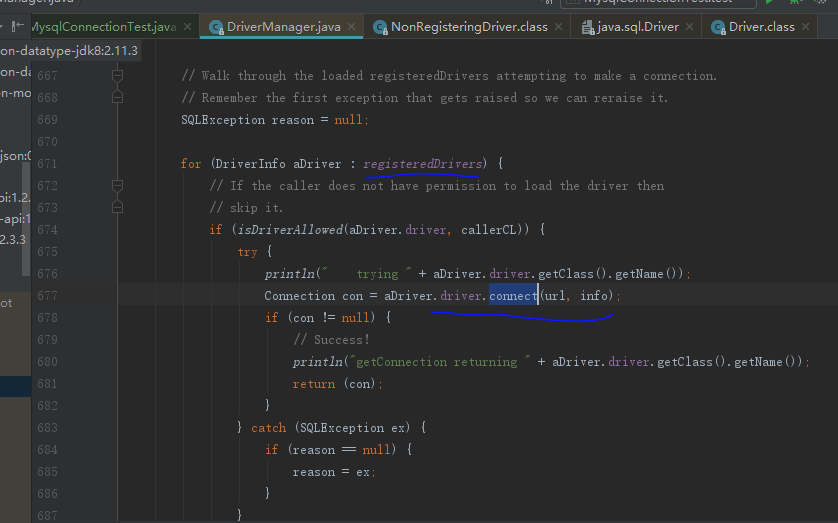
然后我们再看DriverManager怎么去getConnection的。我们可以看到getConnection里面会有一个遍历所有的Drivers,去建立连接。
同样的我们可以看到mysql建立连接的实现类是NonRegisteringDriver,接下来看下这里面是怎么建立连接的。

那我们可以看到 NonRegisteringDriver 的connect方法里面就是根据不同的连接类型 建立connection实例。
这些连接类型是定义在ConnectionUrls里面的一个枚举类 有jdbc:mysql、jdbc:mysql:loadbalance等等,就是根据我们的url来区分。

 public Connection connect(String url, Properties info) throws SQLException {
        try {
            try {
                if (!ConnectionUrl.acceptsUrl(url)) {
                    return null;
                } else {
                    ConnectionUrl conStr = ConnectionUrl.getConnectionUrlInstance(url, info);
                    switch(conStr.getType()) {
                    case SINGLE_CONNECTION:
                        return ConnectionImpl.getInstance(conStr.getMainHost());
                    case FAILOVER_CONNECTION:
                    case FAILOVER_DNS_SRV_CONNECTION:
                        return FailoverConnectionProxy.createProxyInstance(conStr);
                    case LOADBALANCE_CONNECTION:
                    case LOADBALANCE_DNS_SRV_CONNECTION:
                        return LoadBalancedConnectionProxy.createProxyInstance(conStr);
                    case REPLICATION_CONNECTION:
                    case REPLICATION_DNS_SRV_CONNECTION:
                        return ReplicationConnectionProxy.createProxyInstance(conStr);
                    default:
                        return null;
                    }
                }
            } catch (UnsupportedConnectionStringException var5) {
                return null;
            } catch (CJException var6) {
                throw (UnableToConnectException)ExceptionFactory.createException(UnableToConnectException.class, Messages.getString("NonRegisteringDriver.17", new Object[]{var6.toString()}), var6);
            }
        } catch (CJException var7) {
            throw SQLExceptionsMapping.translateException(var7);
        }
    }
那我们从最简单的 SINGLE_CONNECTION类型看 即我们url是以 jdbc:mysql开头的。实现也是很简单就是new ConnectionImpl 返回connection实例
case SINGLE_CONNECTION:
    return ConnectionImpl.getInstance(conStr.getMainHost());
第二 看下常见的负载均衡连接 ,loadbalance连接时通过反射方式生成connection实例的。
case LOADBALANCE_CONNECTION:
                    case LOADBALANCE_DNS_SRV_CONNECTION:
                        return LoadBalancedConnectionProxy.createProxyInstance(conStr);
我们可以看到LoadBalanceProxy来实现的,通过java 反射,java.lang.reflect.Proxy.newProxyInstance ,通过构造器Constructor 来生成实例对象。
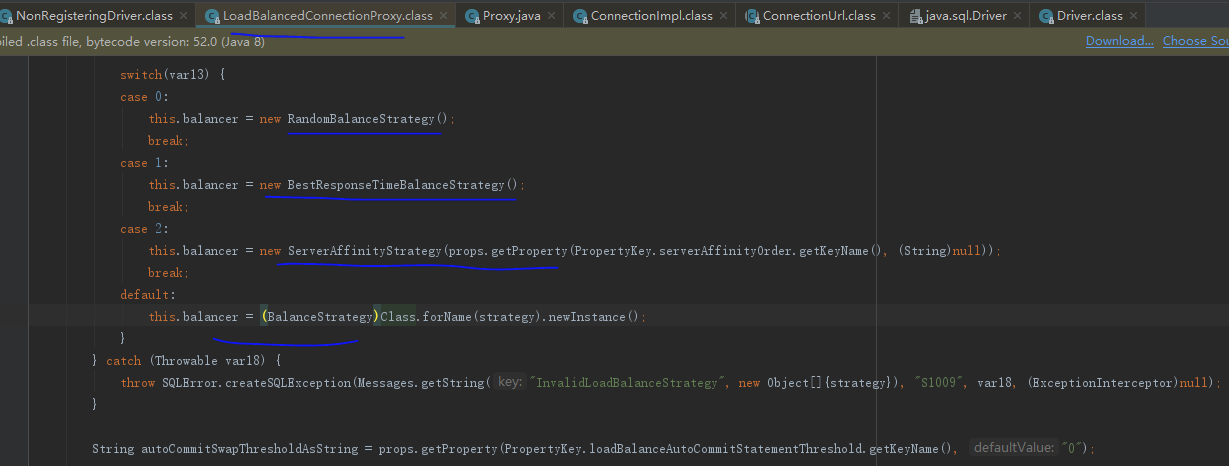
真正一些策略性的选择在 LoadBalanceProxy的构造方法中可以看到,默认是随机策略 random
public static LoadBalancedConnection createProxyInstance(ConnectionUrl connectionUrl) throws SQLException {
    LoadBalancedConnectionProxy connProxy = new LoadBalancedConnectionProxy(connectionUrl);
    return (LoadBalancedConnection)Proxy.newProxyInstance(LoadBalancedConnection.class.getClassLoader(), INTERFACES_TO_PROXY, connProxy);
}
如下图我们可以看到构造方法中几种loadbalance策略选择
RandomBalanceStrategy

BestResponseTimeBalanceStrategy

ServerAffinityStrategy

第三种可以看到有主备的策略,跟loadbalance一样通过 java 反射,java.lang.reflect.Proxy.newProxyInstance ,通过构造器Constructor 来生成实例对象。
case REPLICATION_CONNECTION:
case REPLICATION_DNS_SRV_CONNECTION:
    return ReplicationConnectionProxy.createProxyInstance(conStr);
所以我们可以直接看下 ReplicationConnectionProxy 代理的实现方法。我们可以看到是优先masterConnection,
master没有再选择slaveConnection,this.currentConnection = this.slavesConnection;
this.currentConnection = this.initializeMasterConnection();
try {
            this.currentConnection = this.initializeMasterConnection();
        } catch (SQLException var10) {
            exCaught = var10;
        }

        if (this.currentConnection == null) {
            if (!this.allowMasterDownConnections || this.slavesConnection == null) {
                if (this.connectionGroup != null) {
                    this.connectionGroup.handleCloseConnection(this.thisAsReplicationConnection);
                }

                if (exCaught != null) {
                    throw exCaught;
                } else {
                    throw SQLError.createSQLException(Messages.getString("ReplicationConnectionProxy.initializationWithEmptyHostsLists"), "S1009", (ExceptionInterceptor)null);
                }
            }

            this.readOnly = true;
            this.currentConnection = this.slavesConnection;
        }
至此我们就能生成connection实例返回,当然这只是一个很粗的链路,里面很多细节还是需要自己亲自看看源码是怎样的。
当然我演示的代码在我的github 仓库里面有可以下载
https://github.com/xusyPersonal/springboot-mybatis-plus-demo.git ,
这个项目是我使用springboot集成mybatis-plus的,可以简单用来学习。今天演示的连接数据库是这个测试类 MysqlConnectionTest,欢迎下载!
mysql和oracle驱动建立连接的过程
标签:intercept gdrive mysq mamicode ping 不同 style hosts rman