时间:2021-07-01 10:21:17 帮助过:11人阅读
ifconfig eth0 | grep "inet addr" | awk ‘{print $2}‘ | cut -d: –f2
mysql –V
cat /etc/redhat-release
uname -a

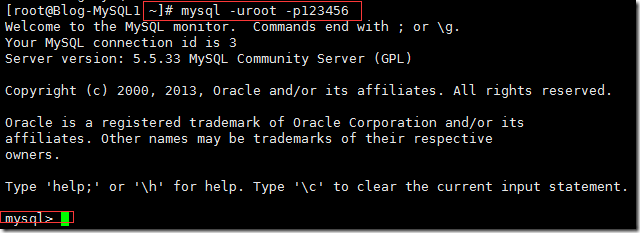
以上算是双主环境搭建的准备工作吧,接下来编辑 Master 1 的 my.cnf 文件
为了方便查阅还是跟之前一样,先过滤一下 # , $ 开头的行吧
cat /etc/my.cnf | grep -v ^# | grep -v ^$ > tmp.log
cat tmp.log > /etc/my.cnf
![]()
Master 1 的 my.cnf 文件中的 [mysqld] 中添加以下字段
vim /etc/my.cnf
server-id = 1
log-bin = mysql-bin
auto_increment_increment = 2
auto_increment_offset = 1
log-slave-updates
expire_logs_days = 7
skip-name-resolve
lower_case_table_names=1
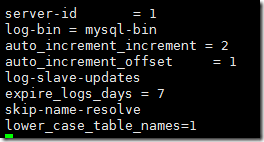
以上参数
auto_increment_increment = 2 #自增ID的间隔,如 1 3 5 间隔为 2
auto_increment_offset = 1 #ID的初始位置
修改配置文件需要重启 Master 1 的数据库
/etc/init.d/mysqld restart

登录 Master 1 的 mysql
mysql -uroot -p123456
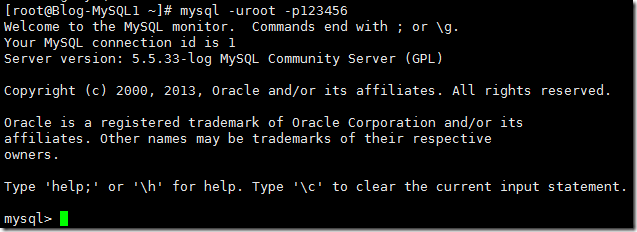
在 Master 1 上创建同步到 Master 2 上的账号
grant replication slave on *.* to yuci@‘%‘ identified by ‘123456‘;
flush privileges;

检查刚才刚才的操作
select user,host from mysql.user;
show grants for yuci@‘%‘;
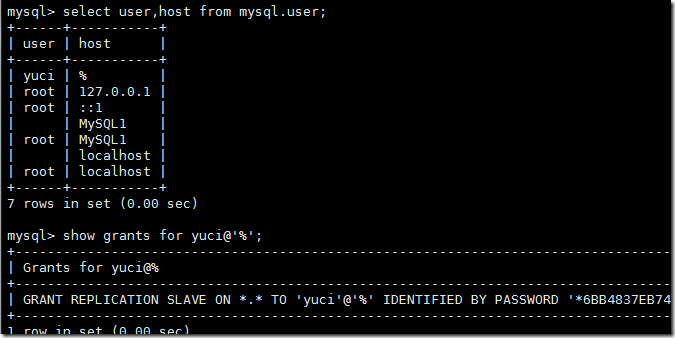
继续操作 Master1 锁表,查看 binlog 文件及 pos 位置节点
flush table with read lock;
show master status;

新打开一个窗口,将 Master 1 的数据库文件导出,通过 scp 命令传递给 Master 2 上
mysqldump -uroot -p123456 --events -A -B > /root/test.sql
scp test.sql root@192.168.133.132:/root
yes

解表 Master 1
unlock tables;
![]()
登陆到 Master 2 上,现将刚才的数据库 test.sql 导入
mysql -uroot -p123456 < test.sql
![]()
编辑 Master 2 的 my.cnf 文件,跟上面的操作一样,只需要注意的是 server-id 和 offset
cat /etc/my.cnf | grep -v ^# | grep -v ^$ > tmp.log
cat tmp.log > /etc/my.cnf
![]()
server-id = 2
log-bin = mysql-bin
auto_increment_increment = 2
auto_increment_offset = 2
log-slave-updates
expire_logs_days = 7
skip-name-resolve
lower_case_table_names=1
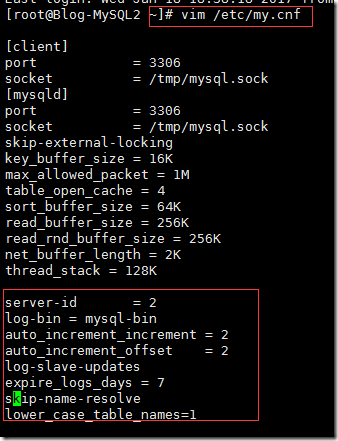
修改配置文件后别忘重启 mysql
/etc/init.d/mysqld restart

登陆 Master 2 的 mysql 数据库
mysql -uroot –p123456
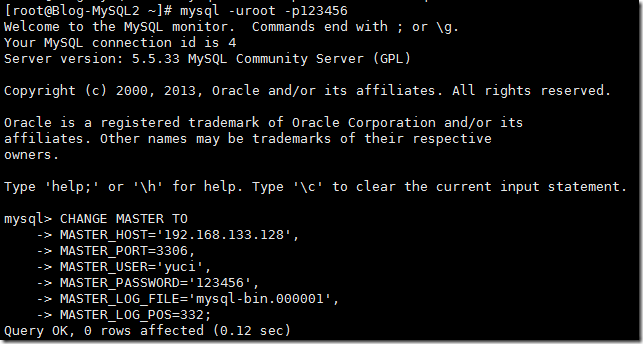
CHANGE MASTER TO
MASTER_HOST=‘192.168.133.128‘,
MASTER_PORT=3306,
MASTER_USER=‘yuci‘,
MASTER_PASSWORD=‘123456‘,
MASTER_LOG_FILE=‘mysql-bin.000001‘,
MASTER_LOG_POS=332;
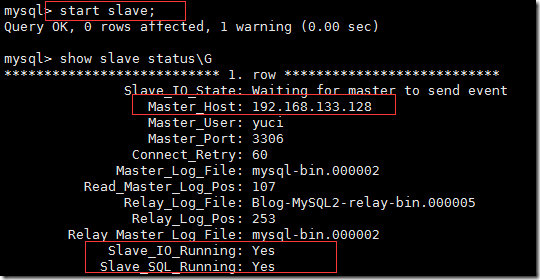
查看两个IO SQL连个线程是否连接成功
start slave;
show slave status\G
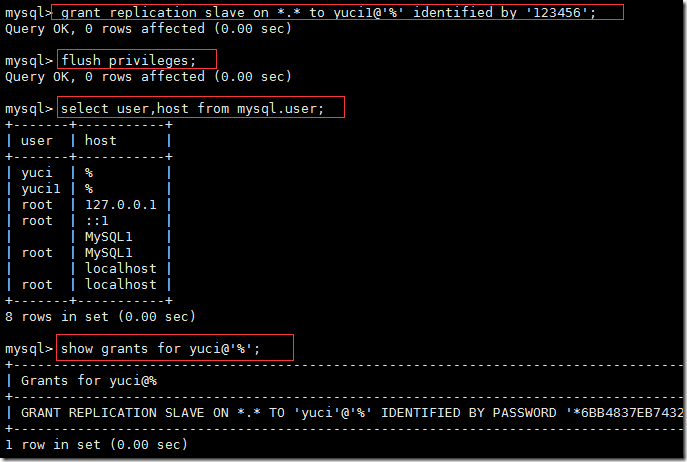
在 Master 2 上创建一个用于同步到 Master 1 的账号,刷新并检查
其实就是两台 mysql 分别创建两个账号,账号不能重复
grant replication slave on *.* to yuci1@‘%‘ identified by ‘123456‘;
flush privileges;
select user,host from mysql.user;
show grants for yuci@‘%‘;
查看 Master 2 的 binlog 文件和 pos 号
show master status;

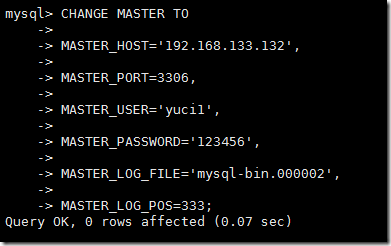
返回 Master 1 上,设置账号同步参数
输入时注意每个参数,别把它和之前的账号,用户名,密码搞反了
CHANGE MASTER TO
MASTER_HOST=‘192.168.133.132‘,
MASTER_PORT=3306,
MASTER_USER=‘yuci1‘,
MASTER_PASSWORD=‘123456‘,
MASTER_LOG_FILE=‘mysql-bin.000002‘,
MASTER_LOG_POS=333;
在 Master 1 上启动 slave,并查看
start slave;
show slave status\G
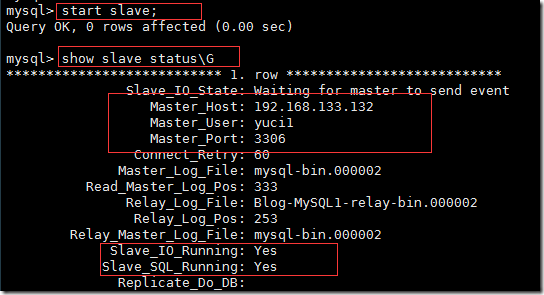
到此为止,双主的环境就算是搭建完成了,接下来测试一下。
先在 Master 1 上创建数据库 yucitest1
create database yucitest1;
show databases;
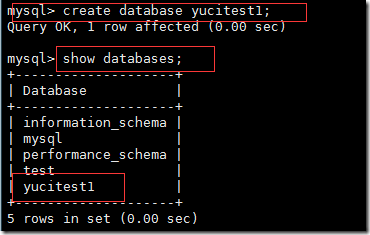
在 Master 2 上查看所有数据库,可以看到刚才创建的 yucitest1 ,将其删除,创建 yucitest2 数据库
show databases;
drop database yucitest1;
create database yucitest2;
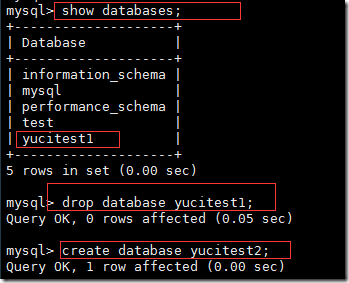
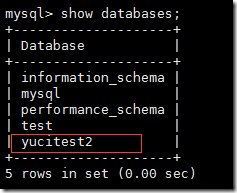
返回 Master 1 看到 yucitest2 ,环境搭建成功
show databases;
本文出自 “LULU” 博客,请务必保留此出处http://aby028.blog.51cto.com/5371905/1893336
MySQL主主同步
标签:mysql 主主 双主