Photoshop漂亮的紫色光斑图标
时间:2021-07-01 10:21:17
帮助过:44人阅读
本教程主要介绍画笔的妙用。制作的时候先定义好想要的图形作为笔刷,各种图形都可以。然后再配合图层样式及滤镜多次使用,即可作出有层次的光斑效果。
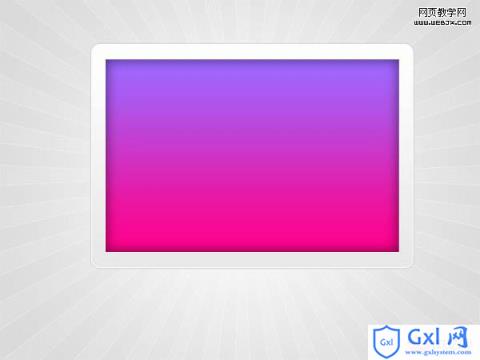
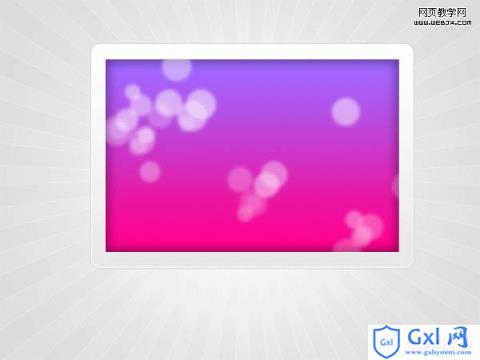
最终效果

1、创建一个800×600的文档,用简单的渐变工具制作太阳发光的效果。

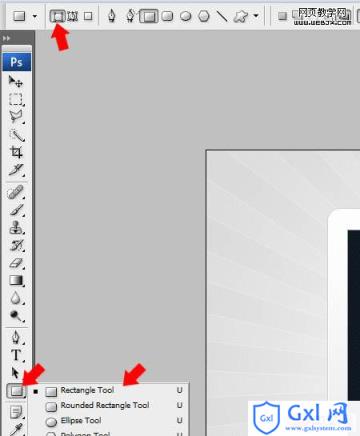
2、选择半径为15px的圆角矩形工具,转换类型为“形状图层”,如图。
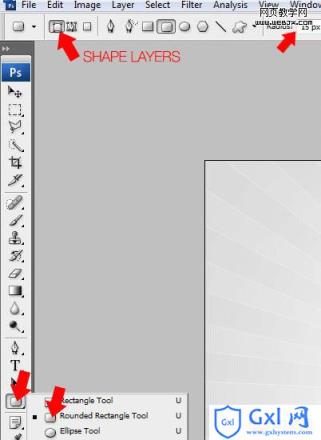
3、使用“形状图层”画出如图的形状。

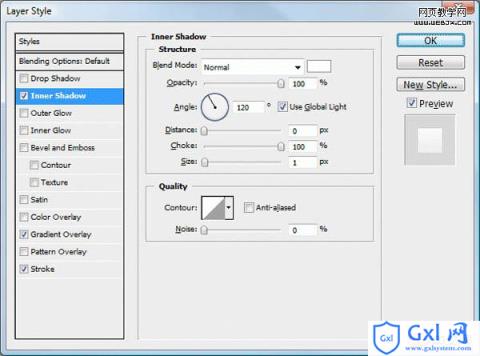
4、再添加如下图层样式:内阴影(模式:正常)。
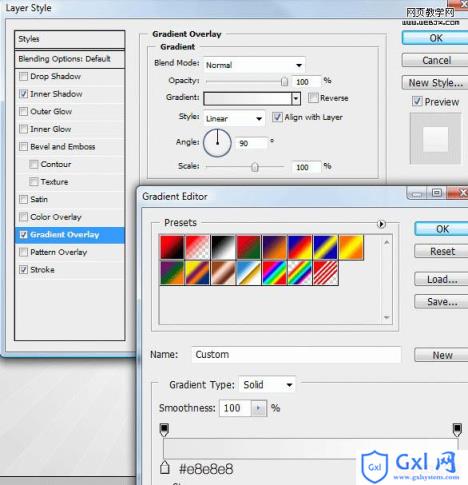
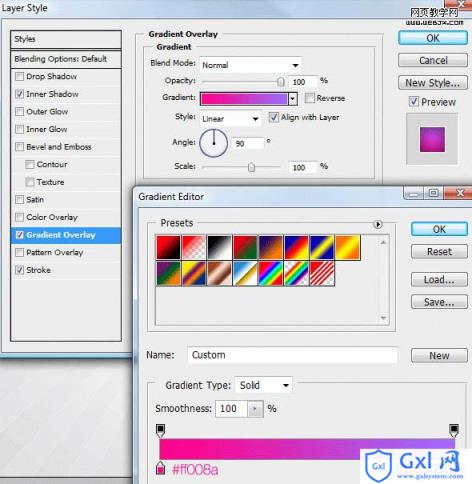
5、渐变叠加(模式:正常,样式:线性)。
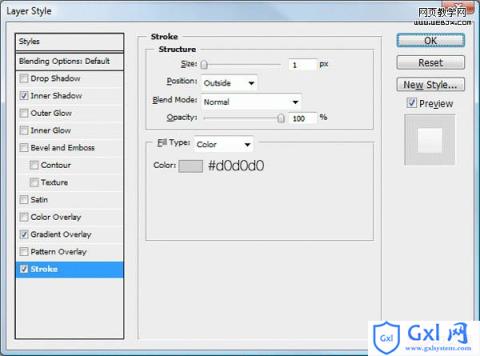
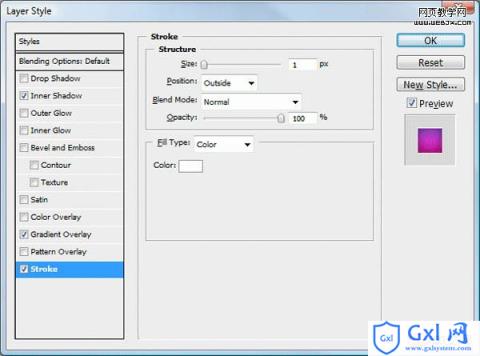
6、描边(位置:外部,模式:正常,填充类型:颜色)。

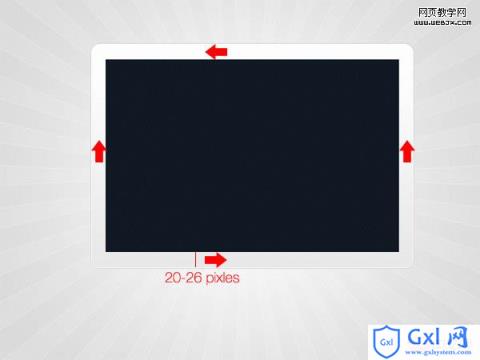
7、选择矩形形状工具,类型为“形状图层”。
8、如图画出一个矩形。
#p#
9、设置图层样式:内阴影(模式:正片叠底)。

10、渐变叠加(模式:正常,样式:线性)。
11、描边(位置:外部,模式:正常,填充类型:颜色)。
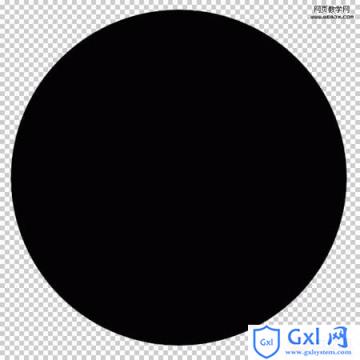
12、新建一个600×600的文档,背景透明,用椭圆工具再按住SHIFT画尽可能大的圆,填充黑色。
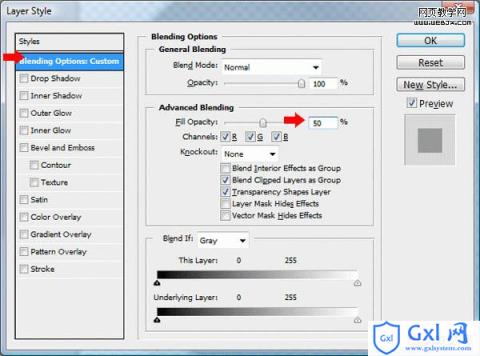
13、在混合选项设置不透明度50%。
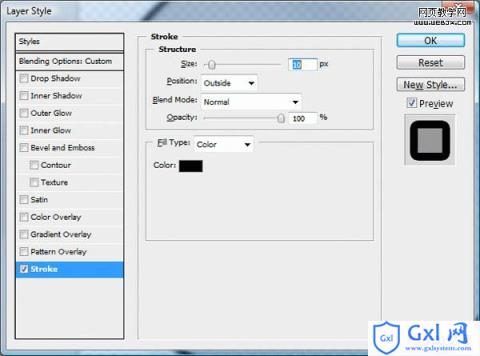
14、描边(位置:外部,模式:正常,填充类型:颜色)。
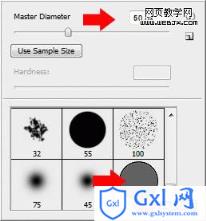
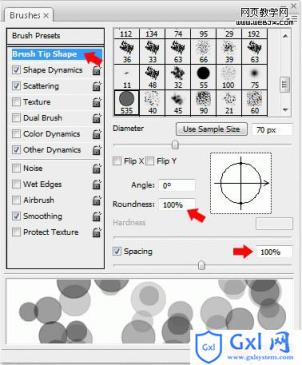
15、编辑>定义画笔预设,存储为“散景”,回到刚刚制作的图层,选择画笔,找到刚定义的画笔样式,进行设置。
#p#
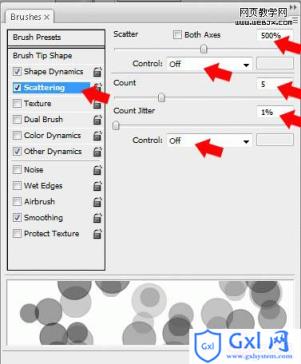
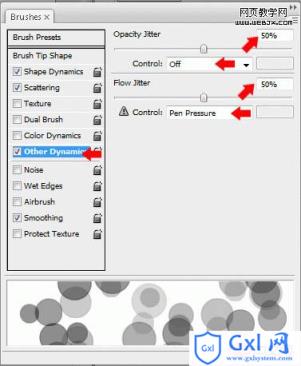
16、按F5使用下面的设置增加画笔样式。

17、用画笔工具在内部矩形自由的画,但是保证圆圈在矩形内部,如果在外部就反选,然后按DELETE键,然后执行:滤镜 >模糊> 高斯模糊,半径设为3px。
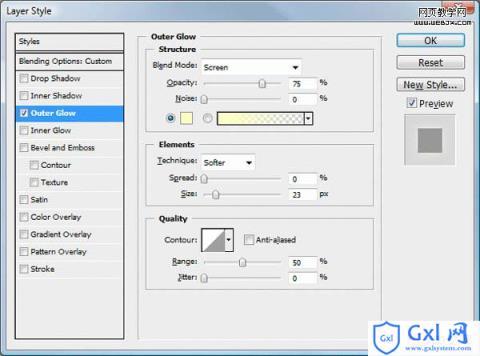
18、新建一个图层,重复这个过程,并设置图层不透明度50%,使用下面的设置制作外发光(模式:滤色,方式:柔和)。

19、又重复上面的过程,设置图层不透明度75%。

20、用钢笔工具制作如下面的路径。
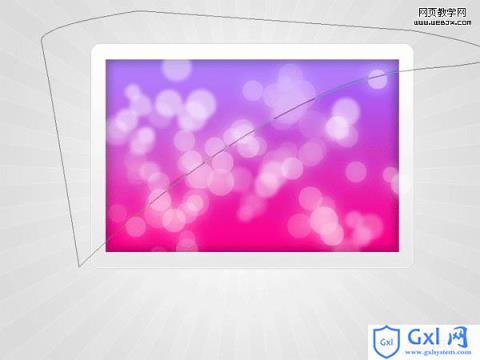
21、用白色填充路径,在这个图层上,然后删除内部矩形外面的部分。

22、重设前景色和背景色,用线性渐变工具,从底部向上拖。

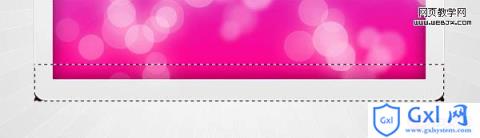
23、用矩形选取工具在环绕周围的底部制作黑色填充的矩形。然后执行滤镜 >模糊> 高斯模糊,半径设为6px。设置该层的不透明度50%,再去掉左右端多余的部分。


24、选择除了背景的图层,合并所有复制的图层,放这个图层在第一个图标的后面,自由变换这个图层,稍微旋转一定的角度。

25、在复制几个,变换,就制作好了。