本教程介绍当前最为流行的潮流及光影风格的海报制作方法,具有很高的学习价值。教程中需要用到其它软件制作光束素材,大家可以下载这款软件研究一下。
制作的时候教程介绍的有点散乱,不过重点需要把握好作者的创作思路。其实教程介绍的就是绚丽的背景的合成方法。如果喜欢就赶快动手吧。
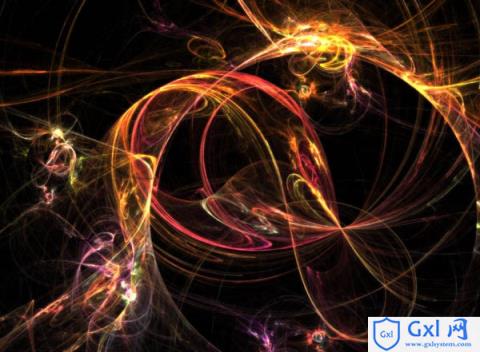
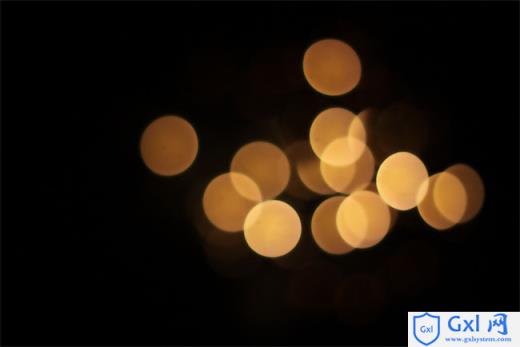
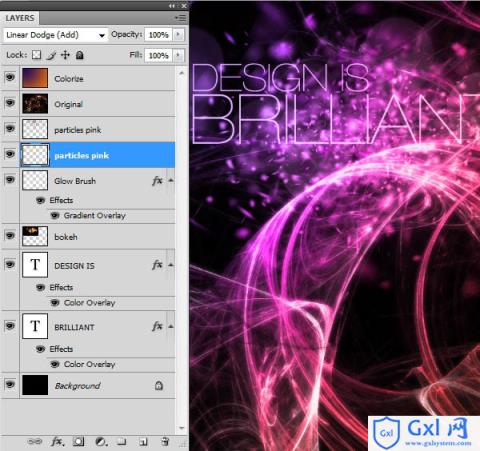
最终效果

1、首先我们需要下载软件Apophysis 地址:http://www.gxlcms.com/使用这款小软件能得到我们想要的流动光影素材,Apophysis下载并安装完毕后请打开软件。注意:如果你不想下载安装此软件,你可以直接跳到第5步。
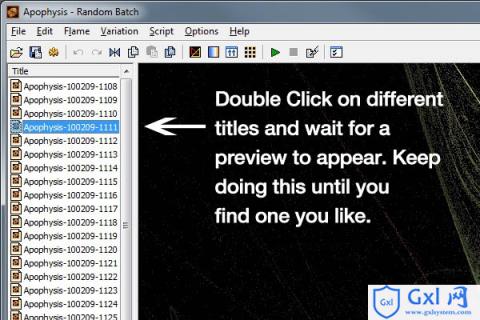
2、双击Apophysis左侧面板中的光影名称,右侧的预览窗口就会显示出对于的效果,它们都是随机产生的,怎么才能从这众多的光影中找到适合我们的素材呢?
我们选取素材的原则是:杂点相对较少、相对强的光源效果(线条流畅、对比明显)不用担心选用的素材不够完美,我们马上会在ps中对它们进行再处理。
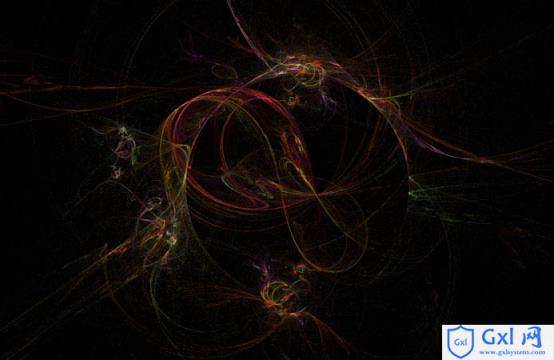
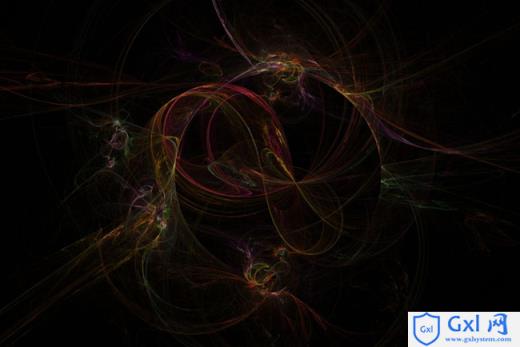
3、希望你能找到满意的素材,我们选的光影如下:
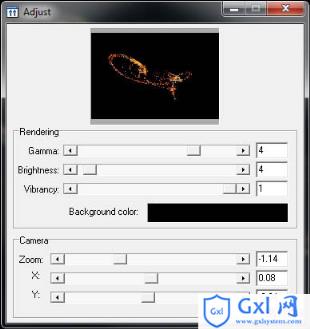
你可以变换流动光影,执行“光影-变换”,打开变换面板后,我们只要单击小预览窗口中的图形,她就会自动置为当前。

放大、缩小流动光影,执行“光影-调整”,打开调整面板后,我们只要拖动“变焦比例”滑块就可轻松调整光影大小。
4、选到理想光影素材后,我们执行“光影-渲染并保存到磁盘”,参数设置如下:
宽度:3000、高度:2000、质量:4000、其他保持默认值,然后点击“渲染”按钮,我们可以借这间隙泡杯茶、听听小曲慢慢等待渲染结束。

5、渲染结束后我们把jpg格式的素材图片导入ps,如果你不想花费时间渲染光影,你也可以下载本教程的psd格式源文件,从中获取我们渲染好的素材图片。
复制背景图层,把得到的新图层重命名为“bg2”。对“bg2”图层执行“滤镜-模糊-高斯模糊”,图层混合模式 为“颜色减淡”,导出图片为”素材2.jpg”.如果你觉得光影太过平淡,可以多次复制光影,然后调整色阶加强光影的锐度。
6、来到背景层,选中“矩形选择工具”,在选项面板中选择“固定大小”,宽度设为2500px\高度设为2500px。

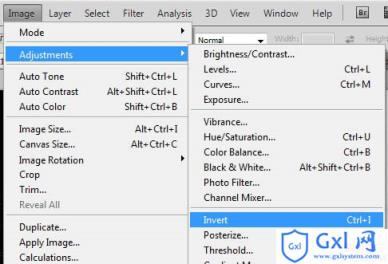
7、点击画面中央,系统会自动选区2500*2500正方形区域。 8、“图形-调整-反相”。
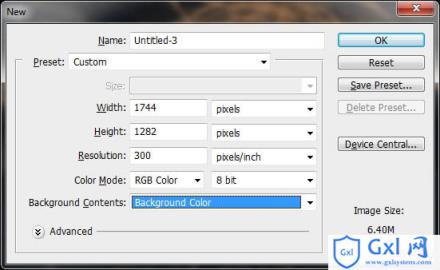
9、“编辑-定义画笔预设”,把画笔命名为“光影”。画笔定义完毕后,我们新建文件,宽设为1744px、高设为1282px,分辨率300dpi、背景色设为黑色。
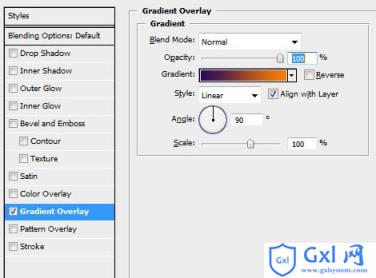
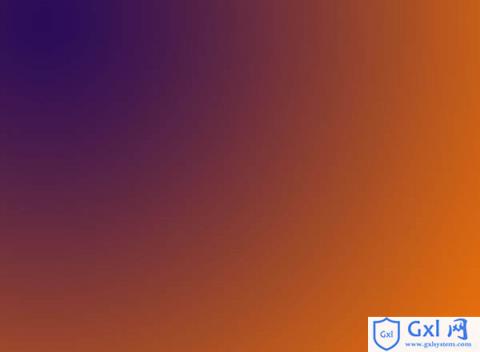
10、新建图层命名为“光影笔刷”,前景色设为白色,选择画笔工具,使用刚才新定义的画笔“光影”在舞台中央点击一下。双击“光影笔刷”图层,在弹出的图层样式面板中,添加“渐变叠加”,颜色设置成从紫罗兰到橙色的渐变。
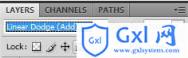
11、把“素材2”导入psd文件,把该图层命名为“原始”,混合模式设为“线性减淡”,然后使用移动工具来调整光影的位置,使它与“光影笔刷”完全吻合。
12、在“原始”图层上方新建“着色”图层,选择渐变工具,颜色仍旧设置为从紫罗兰到橙色的渐变,从画面左上方到右下角拖动手柄完成渐变。
13、更改“着色”图层的混合模式为“饱和度”,到此光影后期调整结束。
14、我们来添加文字“DESIGN IS BILLIANT”,字体“Helvetica Neue – Ultra Light Extended” 颜色“#ffca53” 确保文字图层位于背景层的上一层。
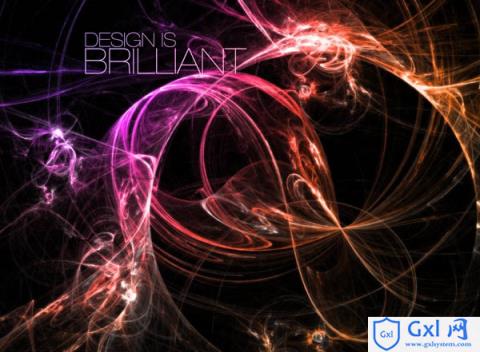
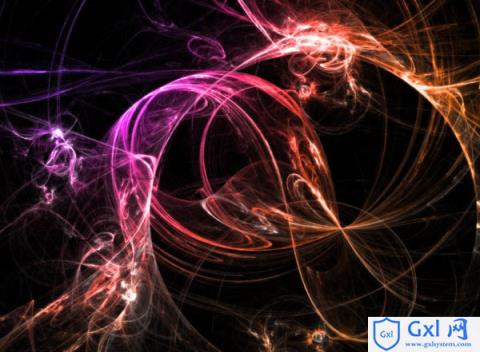
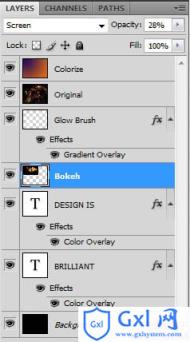
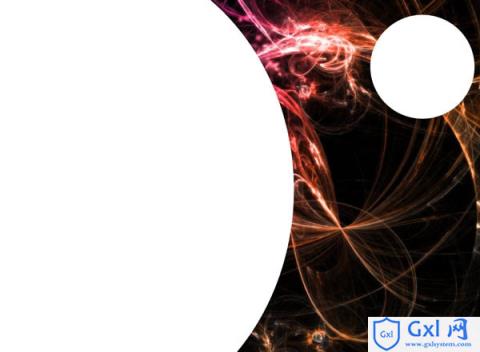
15、打开下图所示的素材,然后把它导入ps,置于文字层的上一层,把图层命名为“虚化”,图层混合模式设为“滤色” ,不透明度“28%”,调整“虚化”的比例以配合文字。

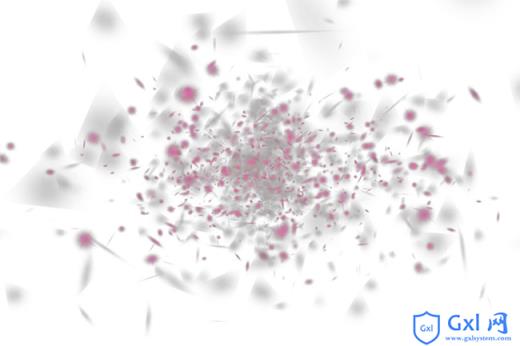
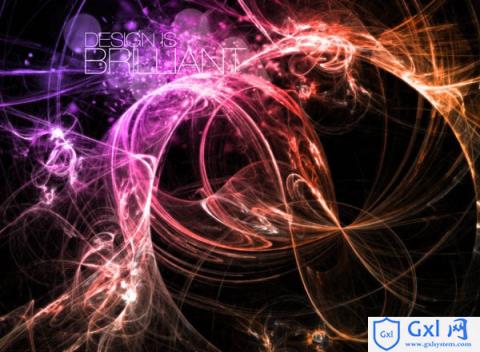
16、打开下图所示的素材,用通道抠出图片的小元素,拖进来,调整比例后,Ctrl+J复制图层,然后Ctrl+E向下拼合图层 ,这样光影更有力量感,图层重命名为“小光影集”,然后把它置于“原始”图层的上一层,修改混合模式为“线性减淡”,复制“小光影集”图层,更改图层混合模式为“叠加”。
17、在“小光影集”图层下方新建图层命名为“圆”,使用椭圆工具绘制白色椭圆如下图:
18、把“圆”图层的混合模式设为“柔光”。
19、最后我们裁剪下图片,因为右侧画面略显平淡。你也可以在右侧空旷区域添加些元素以丰富画面。
教程到此结束,希望你能够喜欢。