Photoshop为人物照加上暴雨动画
时间:2021-07-01 10:21:17
帮助过:65人阅读
教程介绍下雨动画的最快捷的制作方法。其中用到了动作,用动作的目的可以快速缩短制作时间。其中动画的重点是雨丝的制作,需要用滤镜及一些简单的调色工具来完成。做好雨丝后,我们再用IR连成动画即可。
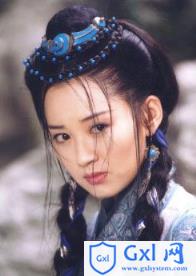
最终效果

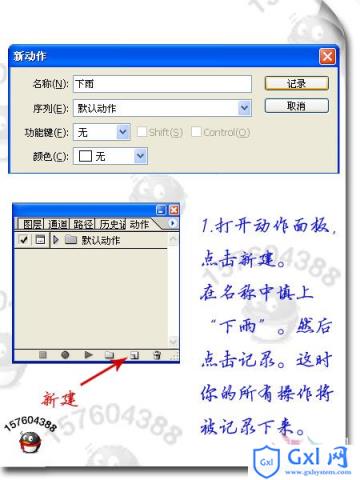
1、打开原图素材,点动作面板,点面板下面的新建按钮新建一个动作,名称自定。再点击记录按钮,这是你的所有操作将被记录下来。
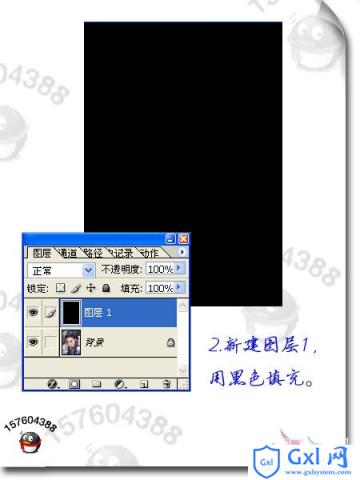
2、新建一个图层得到“图层1”,然后填充黑色。
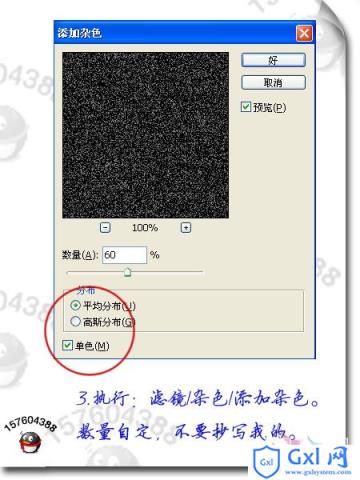
3、执行:滤镜 > 杂色 > 添加杂色,勾选单色,参数设置如下图。
4、执行:滤镜 > 模糊 > 动感模糊,角度和距离可以自行设定,不同的数值可以产生不同的效果。

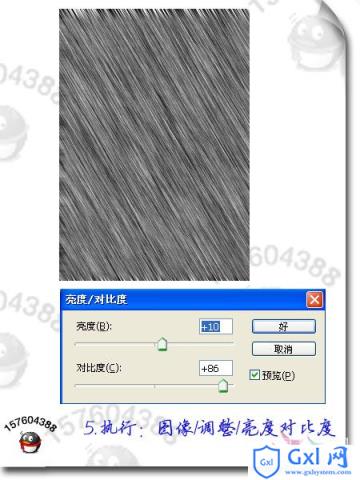
5、执行:图像 > 调整 > 亮度/对比度,参数设置如下图。
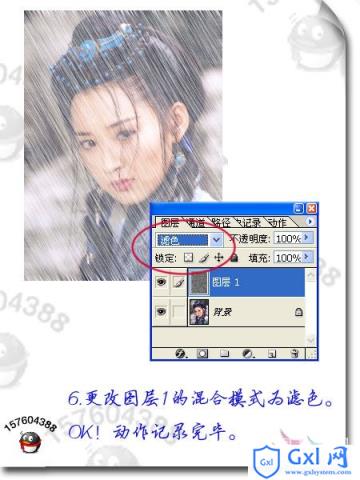
6、把图层1图层混合模式改为“滤色”,点动作面板下面的停止按钮,动作记录完成。
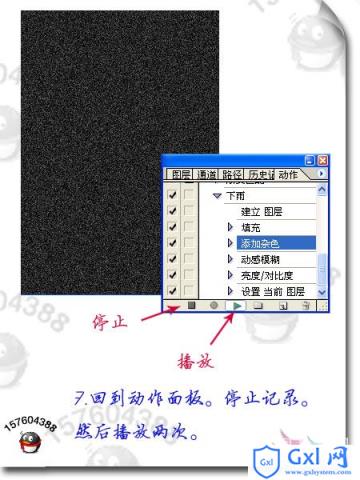
7、再点动作面板下面的播放按钮两次,得到另外两个图层。
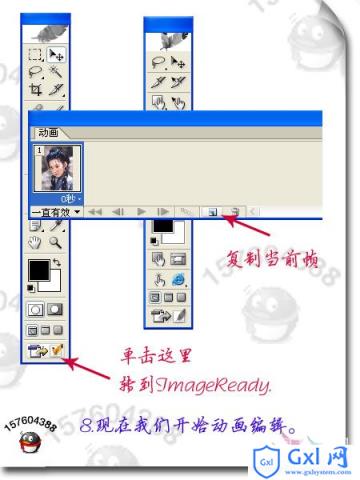
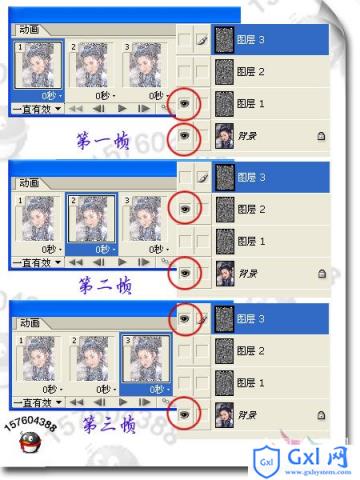
8、下面开始动画编辑,点工具面板下面的IR按钮进入IR操作,在动画控制面板中新建帧,如下图。
9、共新建3个帧,每一帧对应的图层如下图。
10、最后预览一下效果,可以自行设置每一帧的时间长短,动画看上去流畅即可。然后导出为GIF动画格式即可。