时间:2021-07-01 10:21:17 帮助过:19人阅读
由于CPython的python解释器在单线程模式下执行,所以导致python的多线程在很多的时候并不能很好地发挥多核cpu的资源。大部分情况都推荐使用多进程。
python的多线程的同步与其他语言基本相同,主要包含:
Lock & RLock :用来确保多线程多共享资源的访问。
Semaphore : 用来确保一定资源多线程访问时的上限,例如资源池。
Event : 是最简单的线程间通信的方式,一个线程可以发送信号,其他的线程接收到信号后执行操作。
二、实例
1)Lock & RLock
Lock对象的状态可以为locked和unlocked
使用acquire()设置为locked状态;
使用release()设置为unlocked状态。
如果当前的状态为unlocked,则acquire()会将状态改为locked然后立即返回。当状态为locked的时候,acquire()将被阻塞直到另一个线程中调用release()来将状态改为unlocked,然后acquire()才可以再次将状态置为locked。
Lock.acquire(blocking=True, timeout=-1),blocking参数表示是否阻塞当前线程等待,timeout表示阻塞时的等待时间 。如果成功地获得lock,则acquire()函数返回True,否则返回False,timeout超时时如果还没有获得lock仍然返回False。
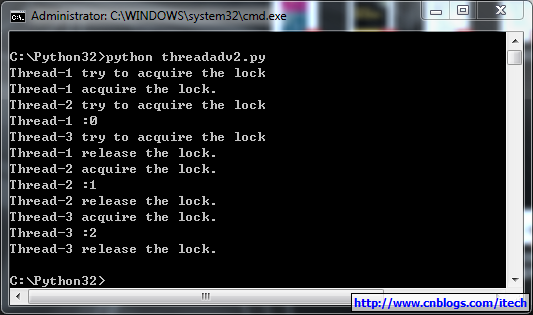
实例:(确保只有一个线程可以访问共享资源)
结果:

RLock与Lock的区别是:RLock中除了状态locked和unlocked外还记录了当前lock的owner和递归层数,使得RLock可以被同一个线程多次acquire()。
2)Semaphore
Semaphore管理一个内置的计数器,
每当调用acquire()时内置计数器-1;
调用release() 时内置计数器+1;
计数器不能小于0;当计数器为0时,acquire()将阻塞线程直到其他线程调用release()。
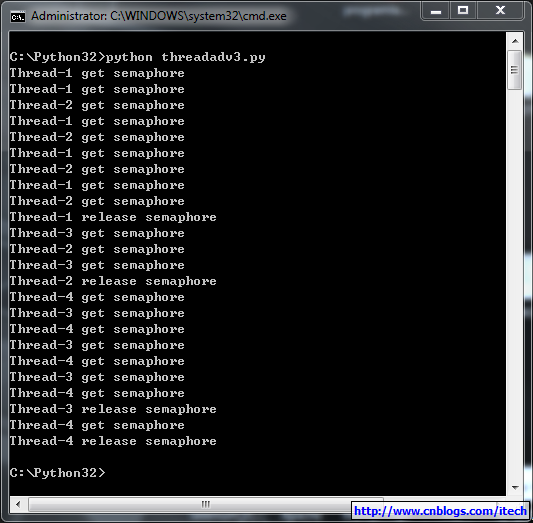
实例:(同时只有2个线程可以获得semaphore,即可以限制最大连接数为2):
semaphore = threading.Semaphore(2)
def func():
if semaphore.acquire():
for i in range(5):
print (threading.currentThread().getName() + ' get semaphore')
semaphore.release()
print (threading.currentThread().getName() + ' release semaphore')
for i in range(4):
t1 = threading.Thread(target=func)
t1.start()
结果:

3) Event
Event内部包含了一个标志位,初始的时候为false。
可以使用使用set()来将其设置为true;
或者使用clear()将其从新设置为false;
可以使用is_set()来检查标志位的状态;
另一个最重要的函数就是wait(timeout=None),用来阻塞当前线程,直到event的内部标志位被设置为true或者timeout超时。如果内部标志位为true则wait()函数理解返回。
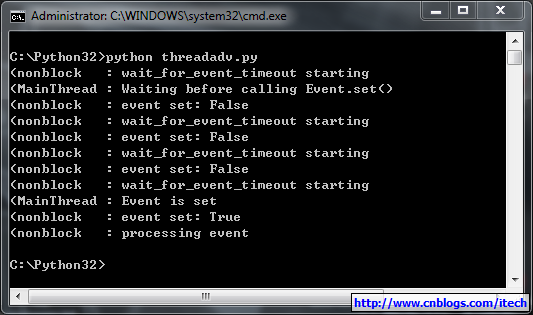
实例: (线程间相互通信)
logging.basicConfig(level=logging.DEBUG,
format="(%(threadName)-10s : %(message)s",
)
def wait_for_event_timeout(e, t):
"""Wait t seconds and then timeout"""
while not e.isSet():
logging.debug("wait_for_event_timeout starting")
event_is_set = e.wait(t)
logging.debug("event set: %s" % event_is_set)
if event_is_set:
logging.debug("processing event")
else:
logging.debug("doing other work")
e = threading.Event()
t2 = threading.Thread(name="nonblock",
target=wait_for_event_timeout,args=(e, 2))
t2.start()
logging.debug("Waiting before calling Event.set()")
time.sleep(7)
e.set()
logging.debug("Event is set")
运行结果:

三、其他
1) 线程局部变量
线程局部变量的值是跟线程相关的,区别与全局的变量。使用非常简单如下:
2)对Lock,semaphore,condition等使用with关键字代替手动调用acquire()和release()。