时间:2021-07-01 10:21:17 帮助过:28人阅读

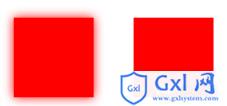
绘制的代码如下
context.fillStyle = "red";
context.save();
context.shadowBlur = 20;
context.shadowColor = "rgb(255,0,0)";
context.fillRect(50,50,100,100);
context.restore();
context.fillRect(200,50,100,100);
这里只是把阴影颜色设置为红色,由于x和y的偏移值都没有设置,所以默认的就是这样的阴影包围状态,shadowColor 设置为全不透的红色,也可以通过argb值来设置透明度,但是对应阴影的区别不大:
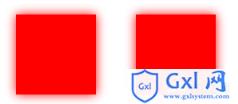
修改为如下的代码,效果如下:

绘制的代码如下:
context.fillStyle = "red";
context.save();
context.shadowBlur = 20;
context.shadowColor = "rgb(255,0,0)";
context.fillRect(50,50,100,100);
context.shadowColor = "argb(255,0,0,0.5)";
context.fillRect(200,50,100,100);
阴影在x轴和y轴上的偏移值,顾名思义,就是让阴影发生偏移,分别在x轴和在y轴上偏移相应的距离。效果如下:

context.fillStyle = "red";
context.shadowBlur = 20;
context.shadowColor = "rgb(255,0,0)";
context.shadowOffsetX = 15;
context.shadowOffsetY = 15;
context.fillRect(50,50,100,100);
阴影不止适用于正方形,其他图形也可以:

context.fillStyle = "red";
context.shadowBlur = 20;
context.shadowColor = "rgb(255,0,0)";
context.shadowOffsetX = 15;
context.shadowOffsetY = 15;
context.beginPath();//开始路径
context.arc(100,100,60,Math.PI / 6,Math.PI,true);
context.closePath();
context.fill();//填充
context.beginPath();//开始路径
context.moveTo(200,50);//设置路径,参数为原点
context.lineTo(360,50);//设置路径直到本线段的终点
context.lineTo(360,150);//设置路径直到本线段的终点
context.closePath();//结束路径
context.fill();//正式绘制
以上就是Html5 Canvas初探学习笔记(8) -阴影的内容,更多相关内容请关注PHP中文网(www.gxlcms.com)!